Workflows
Introduction
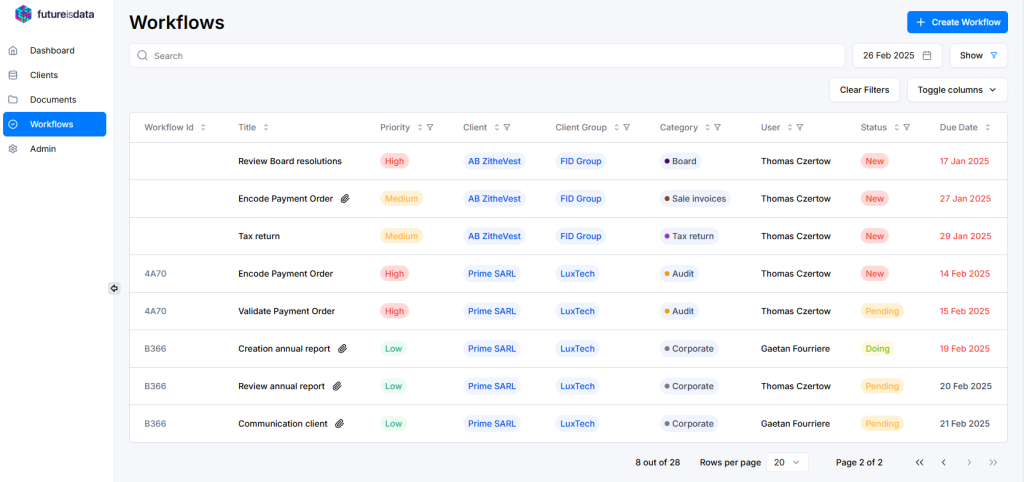
In this tab, you will see a list of all tasks related to your clients. Depending on your roles, the list will be filtered, and you won’t have the same permissions:
If you are assigned as a “Manager”:
- You will see the complete list of all tasks assigned to the client.
- You will have the ability to modify the list of all tasks assigned to the client.
If you are assigned as “Ops”:
- You will only see the tasks assigned to you by default.
- You will not be able to modify tasks that you are not assigned to.
Types of workflows
You will also have the ability to create various types of workflows, including :
- Workflow
- Single task
- Recurring task (monthly tasks or yearly tasks)
You can assign these the created tasks to any person staffed on the client and track their resolution by changing the status from ‘New’ to ‘In Progress,’ ‘Pending,’ and ‘Done’.
Workflow
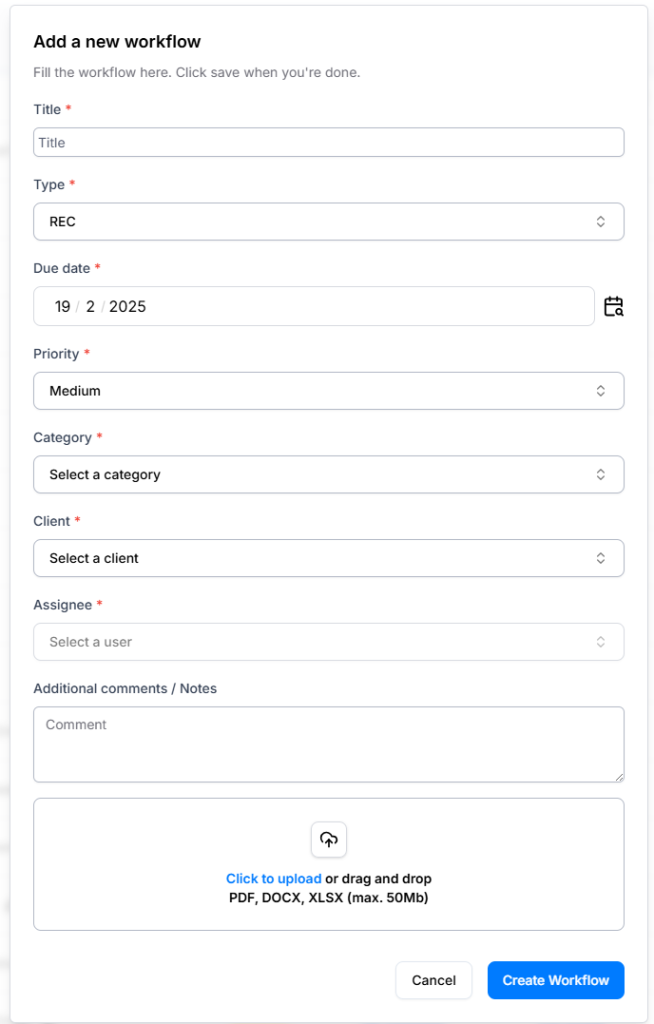
To create a workflow, click on “Create Workflow”, then select “Workflow”. You will need to fill out the form with the following key information:
- Client
- Workflow Template: Configured by the Admin users
- Category
- Start Date
Once these fields are filled, a list of preconfigured steps associated with the selected template will be displayed.
- Owner : Users will be assigned based on the client’s staffing.
- Deadline : The due date will be calculated according to the start date and the template’s configuration.

Once the workflow is launched by clicking “Create Workflow”, all tasks associated to the workflowa will be created.
You will also have the option to view all tasks in the workflow by clicking on the “Workflow ID” next to the title.
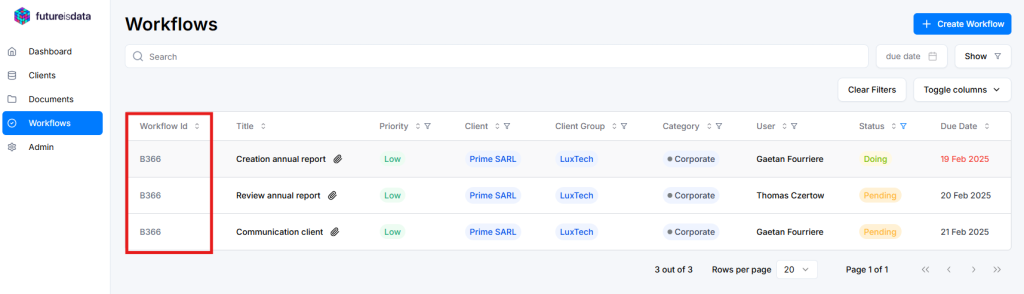
Workflow Id to display all steps of the workflow
When creating a workflow, you can associate one or more documents with it. To do so:
- Upload the documents at the bottom of the workflow creation form. You will need to classify each document before saving the workflow.
Whenever one or more documents are linked to the workflow, a paperclip icon will appear next to each task of the workflow to indicate that a document is attached. When you open the form for one of these tasks, you can view the document by clicking on the eye icon next to the document name.
Important
The task and the document must be associated with the same client.
Single task
To create a single task, choose “Single” after clicking on “Create Workflow”. You will then need to fill the form with the key informations.
When creating a task, you can also associate associate one or more documents with it.
Recurring task
To create a single task, choose “Recurrent” after clicking on “Create Workflow”. You will then need to fill the form with the key informations.
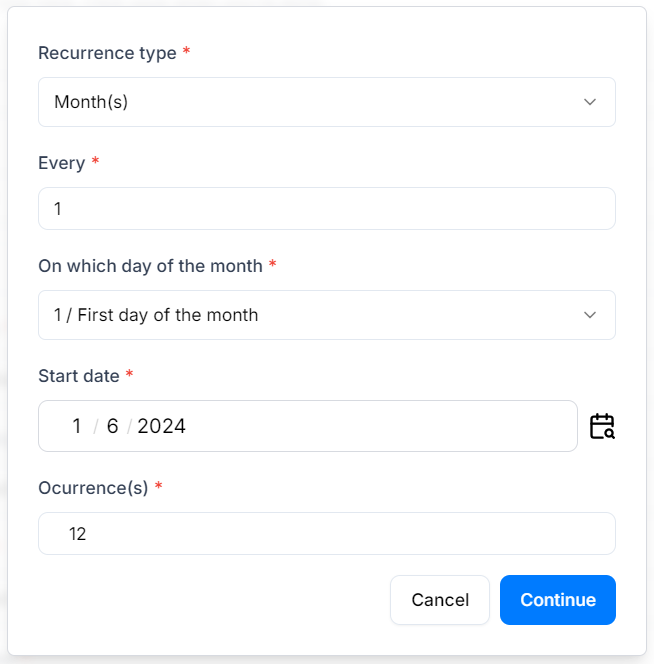
You will need to select a due date for single tasks, whereas for recurring tasks, you will need to select:
- Every: the frequency
- Each: Select the day of the month for monthly tasks, and both the day and month for yearly tasks
- Start date: The date when the recurrence will begin
- Occurrences: The number of times the recurrence will take place
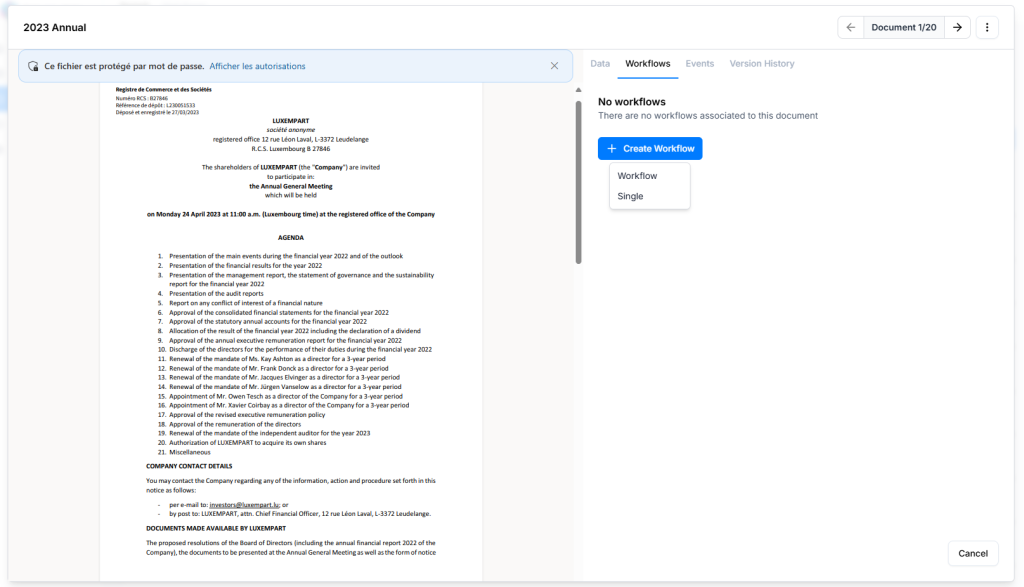
Create a workflow from the document preview
It’s also possible to create a workflow or a single task from the document preview. To do so :
- Click on a document to open its preview
- Clicking on the “Workflows” tab to view all the tasks associated with the document
- Click on “Create Workflow”. You will then need to choose “Workflow” if you want to create a complete workflow or “Single” if you need to create a single task.
- Fill the form with the key informations and save. Once save, all created tasks will be assigned to this document.
Note
You can create a task using three modules : Tasks, Clients and Documents
– Regardless of the point of creation, tasks will be displayed in the task module